Hello, fellow home improvers! I’m Thomas, your friendly neighborhood carpenter. If you’re contemplating the idea of installing crown molding in your home but are intimidated by irregular angles or high, vaulted ceilings, fear not! I’m here to guide you through this seemingly complex task. Whether you’re a beginner or an advanced DIY enthusiast, this guide is for you!
Cutting Crown Molding: The Basics
Before tackling odd angles, it’s crucial to grasp the fundamentals of cutting crown molding. Remember, mastery of the basics is key to handling more complex tasks. Cutting crown molding, regardless of the angle, follows similar principles. However, precise measurements are paramount for achieving optimal results. Here’s what you’ll need:
- Miter Saw/Angle Finder/Protractor
- Measuring Tape
- Blue Tape
- Mechanical Pencil
- Wood Block cut to a right triangle (45, 45, and 90-degree angles)
Gather your tools, and let’s dive in! Check out the video below for a beginner-friendly tutorial on cutting crown molding.
Cutting Crown Molding at Unique Angles
Measuring is the cornerstone of cutting crown molding, be it regular or at peculiar angles. Here are some tips:
- Accurate Measurements: Measure the crown molding length from corner to corner. If it’s lengthy, mark an easily remembered midpoint on your tape, continue measuring, and then add both measurements. Accuracy is key!
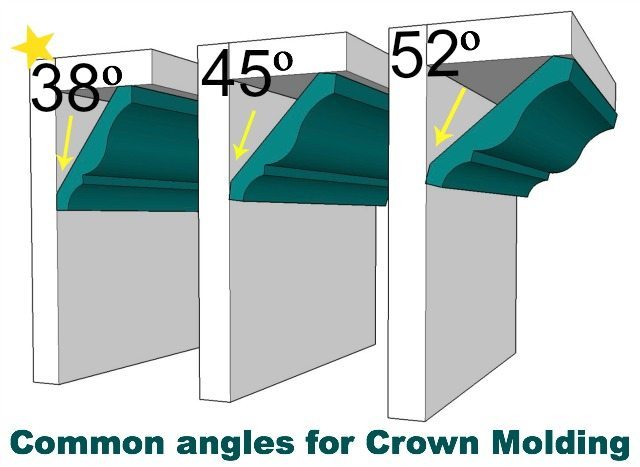
- Angle Precision: Determine the precise angle for your cuts using a protractor. Record this to set your miter saw later. If you’re dealing with non-right-angled ceilings, adjust your molding’s bevel to sit flush against the wall.
- Marking the Molding: Draw a line on the molding to indicate your cut. For each corner, you’ll need two symmetrically opposite cuts. Avoid simple 90-degree cuts for long sections – they’ll look unsightly.
- Using the Miter Saw: Mark the crown molding’s outer edge position with blue painter’s tape. Remember, the top end faces downwards. If your miter saw can’t accommodate the angle, use a 45-degree wood block as an extension. Cut slightly off the line to avoid gaps and proceed slowly, particularly for steep angles.
For an additional visual guide, watch the video below on cutting crown molding at unusual angles.
Important Details Table
| Aspect | Details |
|---|---|
| Tools Needed | Miter Saw, Angle Finder, Protractor, Measuring Tape, Blue Tape, Mechanical Pencil, Wood Block (Right Triangle) |
| Measuring Length | From corner to corner, use midpoints for long distances. |
| Measuring Angle | Use a protractor, adjust bevel for non-90-degree ceilings. |
| Marking for Cut | Draw a line on the molding, two cuts per corner, avoid simple 90-degree cuts for long sections. |
| Miter Saw Use | Mark outer edge with tape, top end down, use a wood block for steep angles, cut off the line, proceed slowly. |